This tutorial demonstrates how to find the maximum print area of your printer.
There are numerous ways of accomplishing this. The fastest (and least ink/paper-consuming) is to use WordPad
There are numerous ways of accomplishing this. Drawing a filled rectangle covering the page is one way, but is ink-intensive. Drawing "dog ears" on each corner is another way, but it can cause confusion and may not always be 100% accurate.
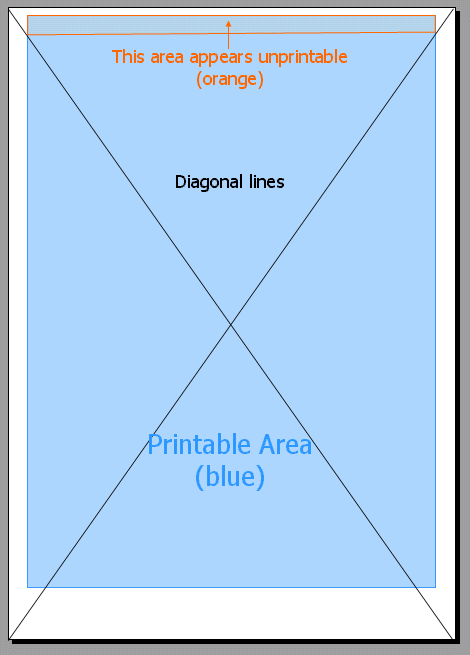
A commonly-suggested way is to draw diagonal lines across the page, however this is the least accurate of the manual methods, which is why my preferred method is to draw pairs of vertical and horizontal lines spanning the entire page. The diagrams below will show why this is more accurate than diagonal lines..
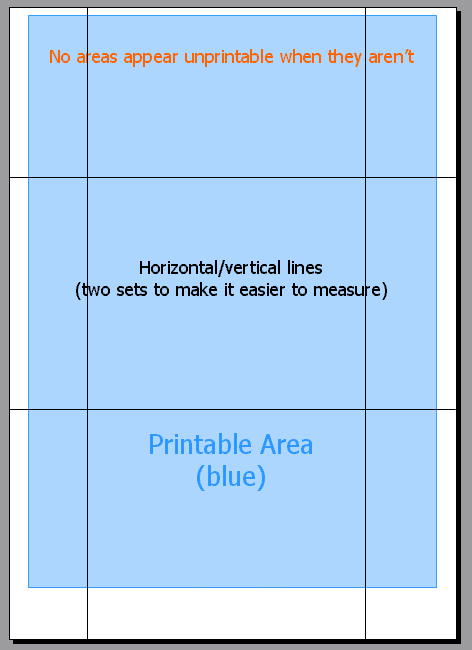
Once you have printed out your lines, you can draw in lines joining the ends of each parallel line with a ruler, and measure the distance of these from the edge of the page. You can then input these values into the Arrange > Layout Guides dialog, and make sure that you never exceed your maximum print area.